Upholstery is a fickle factor. It’s weak to snags, tears and UV gentle, and even when it’s in good condition, ever-changing kinds can render your saddle bland or dated in just a few years. A whole alternative can set you again a fairly penny, and whereas swapping the seat cowl is much extra inexpensive, the artwork of upholstery seems like black magic to the uninitiated. However what if I instructed you it’s not solely easy, it’s downright inexpensive?
Whether or not you journey a sportbike, journey tourer or a classic café racer, a top quality bike seat cowl makes a giant distinction. On this information, we’ll stroll you thru the method with a little bit assist from our pals at Luimoto—a specialist agency out of Vancouver, Canada.
Why Get well Your Motorbike Seat? There are two primary causes to put in a brand new bike seat cowl: perform and type.
On the useful aspect, seat covers put on out. UV rays, rain, sweat and fixed compression break down foam and vinyl over time. Cracked or torn materials can maintain water like a sponge and soak via to your denims, to not point out exposing the froth to additional harm. A recent cowl solves that, and for those who go together with a high-quality aftermarket possibility, it would even enhance consolation and longevity over inventory.
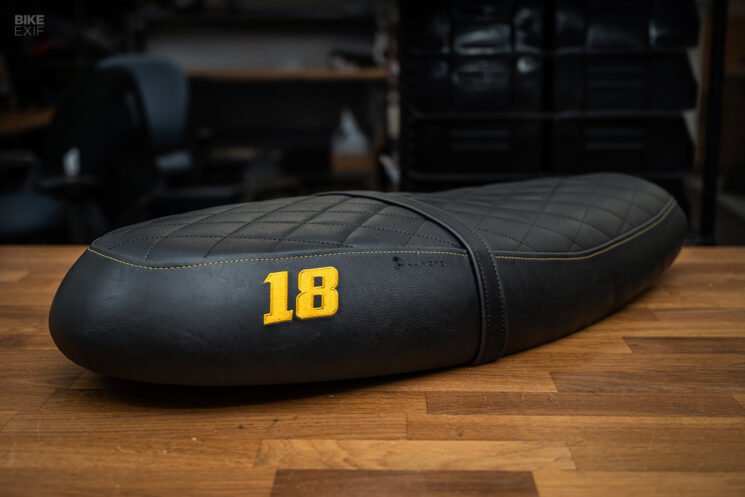
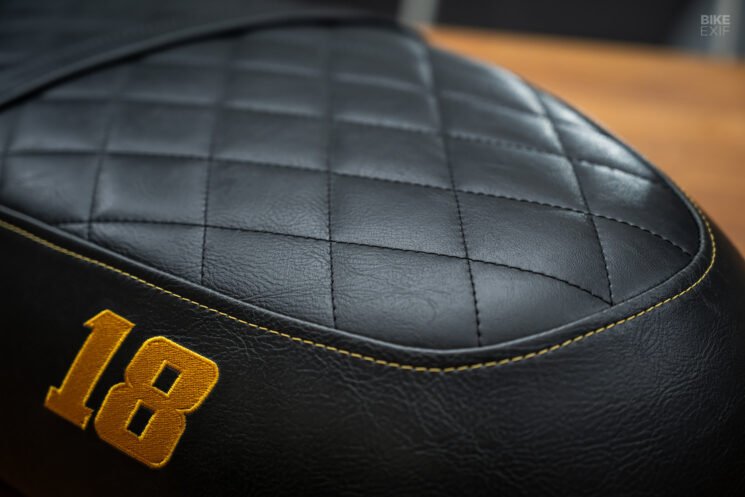
On the shape aspect, swapping your seat cowl is likely one of the quickest methods to offer your bike a visible refresh. A manufacturing unit seat may work high-quality, however they’re by no means probably the most aesthetically pleasing, and normally really feel like an space the place prices have been reduce. Premium supplies like Alcantara with daring distinction stitching, carbon-look vinyls and quilted finishes may be simply the factor to set your journey aside from the remainder.
And right here’s the kicker: you don’t must be an upholsterer to put in one. With just a few primary instruments, a little bit of persistence and possibly a warmth gun, you possibly can remodel your seat in a day.
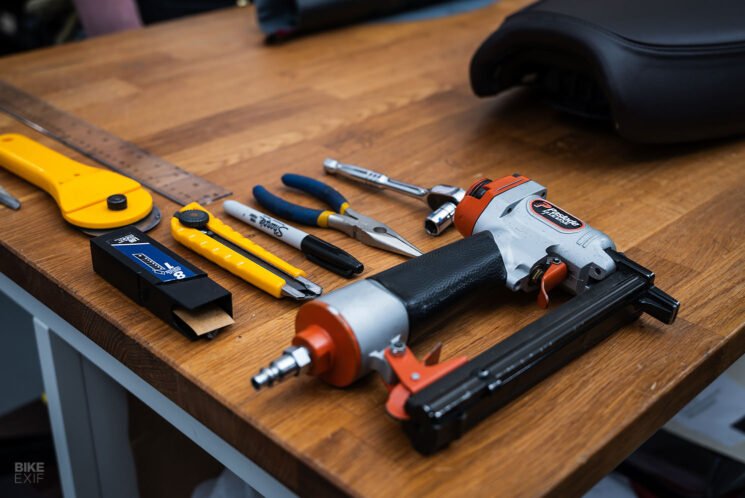
What You’ll Want Recovering your bike seat isn’t difficult, however having the best instruments will prevent frustration. When there’s a will, there’s a method, however there are specific gadgets you shouldn’t skimp on.
First off, you’ll want a top quality staple gun, however simply since you’ve carried out some dwelling enchancment tasks doesn’t imply you’re prepared for upholstery. I believe this may be greatest defined by analyzing the job you’re asking the stapler to do. You want to have the ability to get into tight areas and constantly drive staples totally into the seat base with out piercing via the seat cowl. An excessive amount of air stress, or staples with too little crown, and also you’ll blast via the fabric solely.
With that in thoughts, you may think about ditching compressed air and utilizing a hand stapler, however this, too, may be problematic. Even when your guide stapler may be adjusted to drive your staples to the best depth, the mechanics of working a guide stapler change into much more troublesome while you’re stretching the seat cowl into place.
You’ll get probably the most constant outcomes with a top quality stapler from BeA or Sailrite, one thing that’s designed to function between 70 and 100 psi. For staples, Luimoto recommends 6 mm (1/4″ leg x 1/2″ crown), and we’ll take it a step additional and advocate chrome steel.
You’ll clearly want a brand new seat cowl as effectively, one thing that’s designed particularly in your yr, make and mannequin—so it pays to seize a top quality cowl from a longtime producer. Using marine-quality supplies, Luimoto covers every little thing from Aprillia to Yamaha, and their merchandise are manufactured proper in Vancouver. You may select from their vary of current model-specific designs, or order a customized cowl with distinctive supplies, colours and embroidery.
From there, you’ll want just a few normal store gadgets like a screwdriver, needlenose pliers, a warmth gun, spray adhesive and rubbing alcohol. Endurance and an honest playlist go a great distance as effectively.
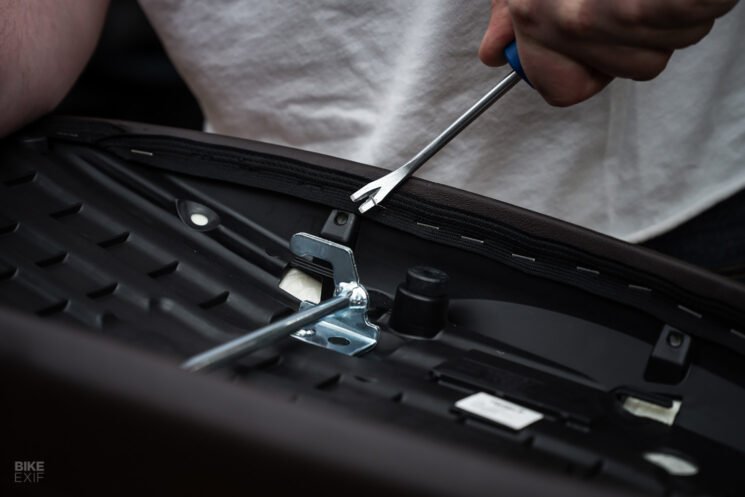
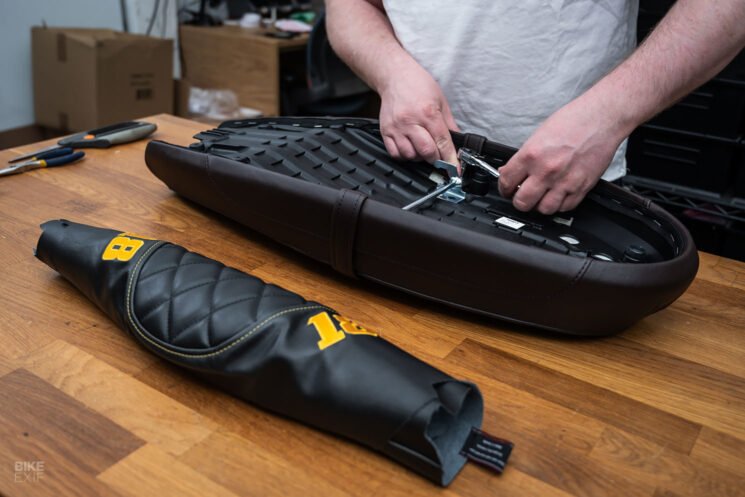
The Course of: 1. Take away the Seat and Previous Cowl Begin by pulling your seat from the bike, and flip it the other way up on a clear workbench. In case your seat’s geared up with a passenger seize deal with, rubber stoppers or different add-ons, now’s the time to take away them, noting their authentic place in the event that they’ll be reused. Subsequent, you’ll see a hoop of staples holding the manufacturing unit cowl on, and you need to use a flathead screwdriver or needle-nose pliers to drag them out. Take your time—ripping the froth or pan right here simply creates further work.
2. Examine the Foam and Pan As soon as the previous cowl’s off, test the froth. If it’s deteriorating or has deep grooves, you may wish to restore it with a foam patch package and even change it solely. If every little thing’s stable, give it a wipe-down with rubbing alcohol and let it dry. A clear floor ensures your new bike seat cowl sits correctly and doesn’t lure filth or moisture.
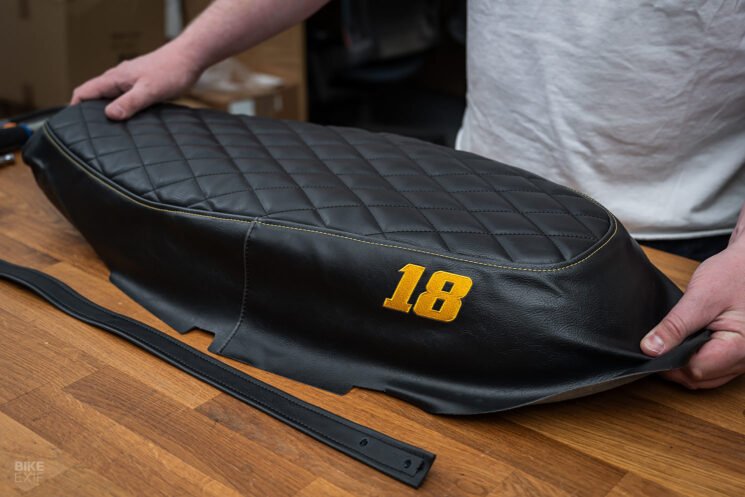
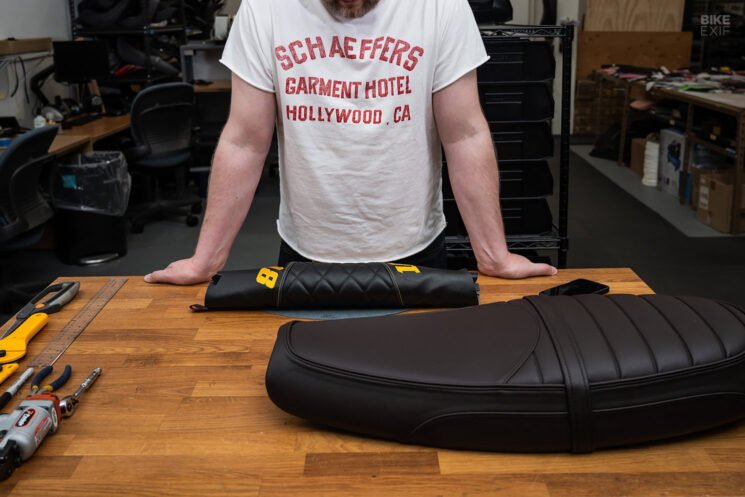
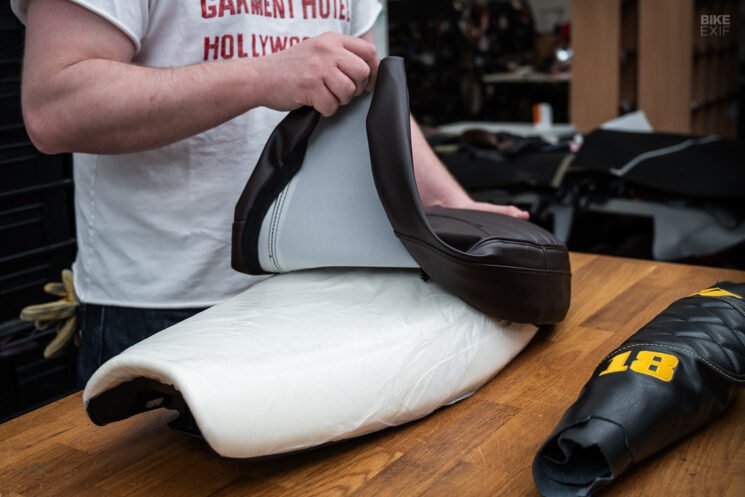
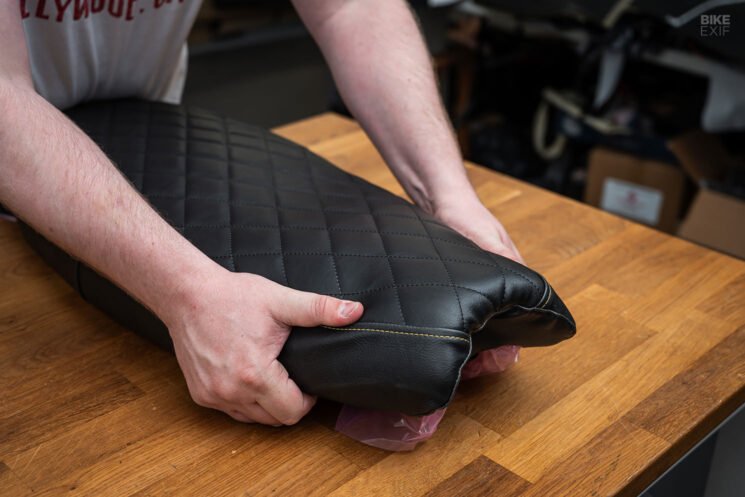
3. Place the New Motorbike Seat Cowl It’s time in your first have a look at your new bike seat cowl, however don’t panic if issues don’t look proper straight out of the field. The duvet might have some creases from transport, which can work themselves out with some warmth. If potential, lay your cowl out within the solar for a bit earlier than set up. Additionally, be aware that the duvet would require some stretching to completely match your foam.
Work the duvet into place on the seat utilizing your arms to get issues becoming correctly. At this stage, I wish to dial in my staple gun with a check piece to make sure the staples gained’t blow via the duvet. Begin on the entrance of the seat, safe one or two non permanent staples, after which work your solution to the rear—pulling the duvet tight and checking for even stress. Use a warmth gun to softly soften the vinyl as you go, particularly round curves and corners.
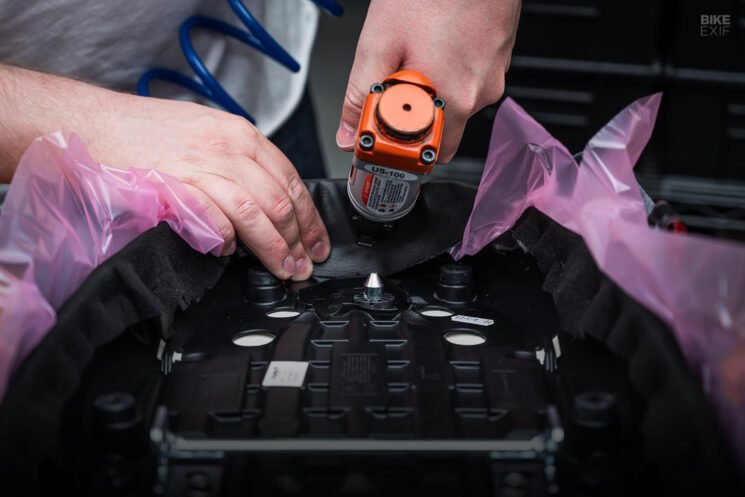
4. Staple It Down When you’re glad with the alignment, begin driving staples in across the perimeter. House them about an inch aside, and at all times work back and forth to take care of even stretch. It’s a bit like becoming a drum head—too tight on one aspect and issues get lumpy. Hold checking the highest floor as you go. A number of wrinkles are high-quality, however massive ripples imply it’s essential again up and restretch. Make sure to trim any areas that intervene with bodywork or seat-mounting {hardware}.
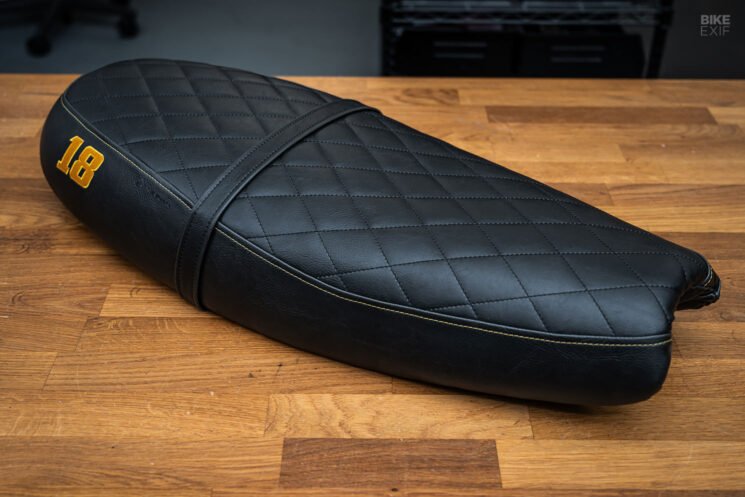
5. Closing Trim and Fitment With the duvet totally stapled down, trim off any extra materials and provides the seat one final once-over to ensure nothing is puckering or lifting. When you’re glad with the match, reinstall any manufacturing unit {hardware} like rubber stoppers or passenger seize straps earlier than remounting it on the bike. Now, it’s time to face again and admire your work.
6. Elective Enhancements As is the case with many tasks, the most effective time to make large enhancements is ‘whilst you’re in there,’ and there are a number of methods to improve the consolation and longevity of your bike seat whereas changing the seat cowl.
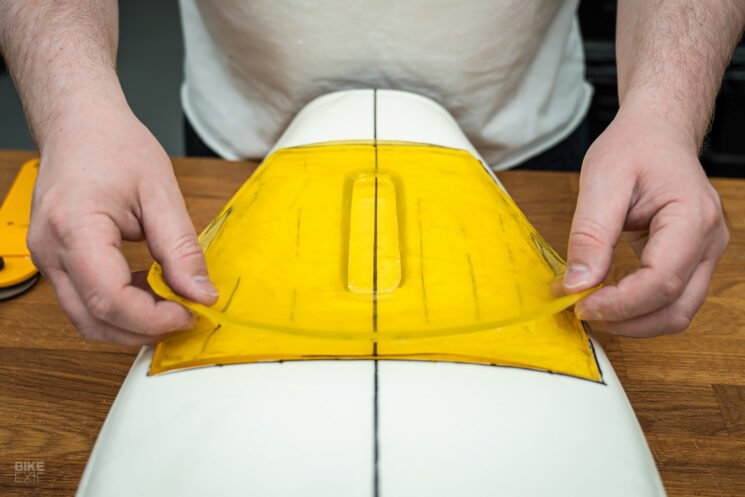
Manufacturing unit foam gained’t final endlessly. If yours is deteriorating or was by no means all that comfy to start with, a Luimoto Premium Gel Insert may vastly enhance your driving expertise. These gel inserts are firmer than OE foam to absorb sharp impacts and reduce fatigue, they usually combine seamlessly beneath a brand new seat cowl.
Putting in a Luimoto Gel Insert simply takes just a few further steps earlier than the brand new seat cowl goes on. The insert is first trimmed to match the form of your foam, after which a cavity the thickness of the gel is carved into the froth with an Exacto knife. Luimoto’s Premium Gel kits embody a layer of extra foam to additional enhance consolation.
Climate is a consideration too. Leather-based and suede look nice, however they’re not good at repelling rain, and seats with heavy stitching patterns can let moisture via. If that’s you, you’ll wish to think about including waterproofing of some kind, or sticking to extra sturdy materials.
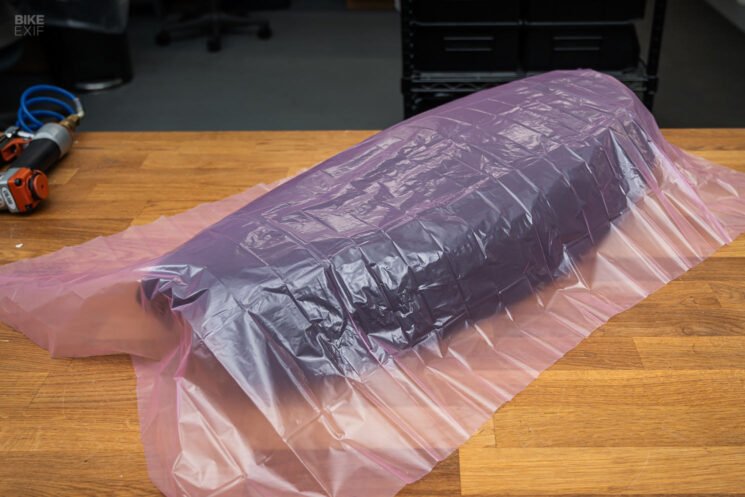
Most of Luismoto’s seat covers use marine-grade vinyl—and those who use much less weatherproof materials ship with an easy-to-install waterproof barrier that’s put in underneath the duvet itself.
Price and Worth So what does this job set you again? Luimoto bike seat covers sometimes vary from $85 to $200, relying on the supplies and mannequin. For that value, you’re getting a tailor-made match with premium materials—typically nicer than what got here from the manufacturing unit.
Think about the price of a staple gun (for those who don’t have already got one) and possibly $10 for provides, and also you’re a complete DIY price effectively underneath $250. That’s a fraction of what customized upholstery outlets cost for a full get well, and the outcome can look simply as sharp.
Closing Ideas Changing your bike seat cowl is a kind of upgrades that hits the candy spot: inexpensive, comparatively straightforward and excessive influence. With the best cowl and a little bit care, you possibly can dramatically enhance each the consolation and visible id of your journey.
And in contrast to bolt-ons or paint jobs, a customized seat cowl is one thing you work together with each time you swing a leg over. Whether or not you’re chasing retro cool, trendy edge or simply making an attempt to keep away from a soggy seat, a well-installed seat cowl will get you there, with type and substance to spare.
Created in partnership with Luimoto.
Trending Merchandise