
They are saying that perfection is the enemy of progress, and whilst you would possibly see a motorcycle that has cruddy instances and previous brown paint, I see a phoenix that’s risen from the ashes. What was as soon as a $400 clunker requiring heavy visor tint to be seen on is now a retro hoonmobile that remembers simply sufficient of the place it got here from. It’s no restoration, however I’d name it an ideal instance of the right way to repurpose and refurbish on a finances.
9 installments and numerous hours have made this machine what it’s, and because the course of took just a little longer than I care to confess, I’ll perceive in the event you missed a couple of steps alongside the way in which. We took deep dives into jobs like rebuilding suspension, lacing wheels and fabricating elements, and now that it’s all stated and carried out, it appears becoming to look again on the journey.
Since I used up all my greatest tech ideas the primary time round, this one’s purely for kicks, and I’m unloading all of the jokes and sincere truths I unnoticed. This bonus installment is greatest loved with a chilly one…
Half 1: The Worst Bike on Bike EXIF
Whereas there was little in the way in which of bodily progress in our first installment (I’ll have degreased the bike earlier than dragging it into the store), I did have my work lower out for me. I needed to introduce you, expensive reader, to the brown liege (the most cost effective full motorbike we may get our fingers on) and clarify why you have been seeing this pile on Bike EXIF.
Our good friend Ken at Cycle X had the bike listed on the market, and our plans to do one thing cool with it had warmed over his icy coronary heart. He knocked a pair hundred off the worth for us, and $400 obtained it dwelling. Whereas the bike was each shade from brown to rust, this decrepit previous Honda proved to be actually good the place it counted.
We’d been engaged on the bike behind the scenes for a couple of weeks at this level, and had already had Motogadget, Bridgestone, Lowbrow Customs, Tuffside Seats and Biltwell on board. The elements have been piling up, however we actually solely had a tough thought of what we needed to do. We didn’t have fancy CAD mockups and even somebody across the store proficient sufficient to sketch one thing on paper, and that had me questioning: can we truly make this all work collectively? Just one method to discover out… [More]
Half 2: The Query No One was Asking
If you already know these bikes, then you already know I used to be padding my stats with this one. After all the CB550 would run; it’s a Honda, however I wanted the engine to indicate indicators of life earlier than we tore the bike down any additional. I feel I marketed this installment as ‘a unfastened order of operations for verifying that your newest bargain-buy motorbike is price reviving,’ a superb little bit of jargon if I say so myself.
You understand the drill, I checked the oil, gave it 12 volts, verified spark and shot some two-stroke combine proper by way of the Kehins. Naturally, it fired proper off, and I feel probably the most surprising factor was that the factors didn’t even require any consideration. I do know that is fundamental revival stuff, however the motorbike had been sitting for 42 years, and it simply fired up and ran.
It didn’t run lengthy, contemplating the advert hoc gasoline supply technique, and the loose-hanging exhaust pipes shot out all manners of pine needles, acorns and different foliage for the length it ran. However alas, we answered the query nobody was asking, and will proceed with tearing this factor down. [More]
Half 3: I Know the Items Match
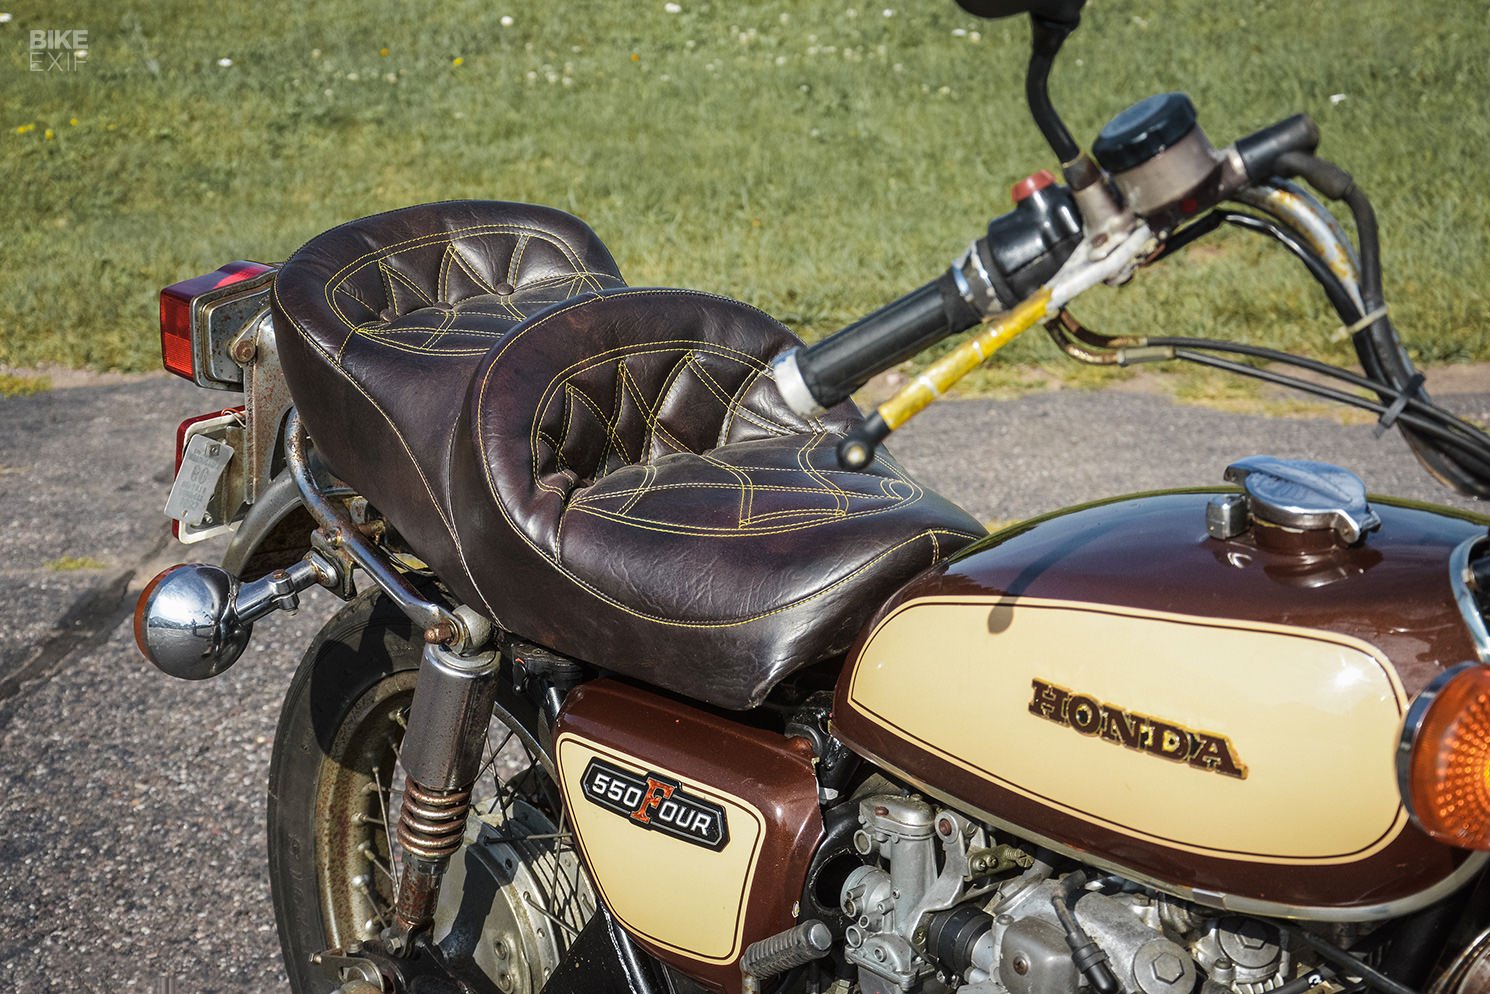
Perhaps I used to be getting forward of myself, however this was when the challenge actually got here alive for me. After tearing the bike all the way down to the purpose the place we had the essential body, suspension, wheels and gasoline tank, I began working with the elements we had available to get an thought of how this factor would come collectively. Putting in the tracker bars from Lowbrow Customs was a superb little bit of low cost and straightforward satisfaction, however becoming our Tuffside common Road Tracker seat would require the angle grinder.
By the top of this installment, the seat was on the bike, however it nonetheless wasn’t becoming proper. It was sufficient to promote me on maintaining the inventory gasoline tank, however I had extra hours of slicing, welding and becoming in my future. [More]
Half 4: Constructing Wheels for Dummies
Most riders price their salt have mounted tires earlier than, however lacing new wheels is a complete completely different ball sport. I’m unsure if I revealed this on the time, however this course of was solely new to me, and probably the most expertise I had with spokes was straightening bent wheels again in my BMX days. And spoiler alert, I wasn’t superb at it.
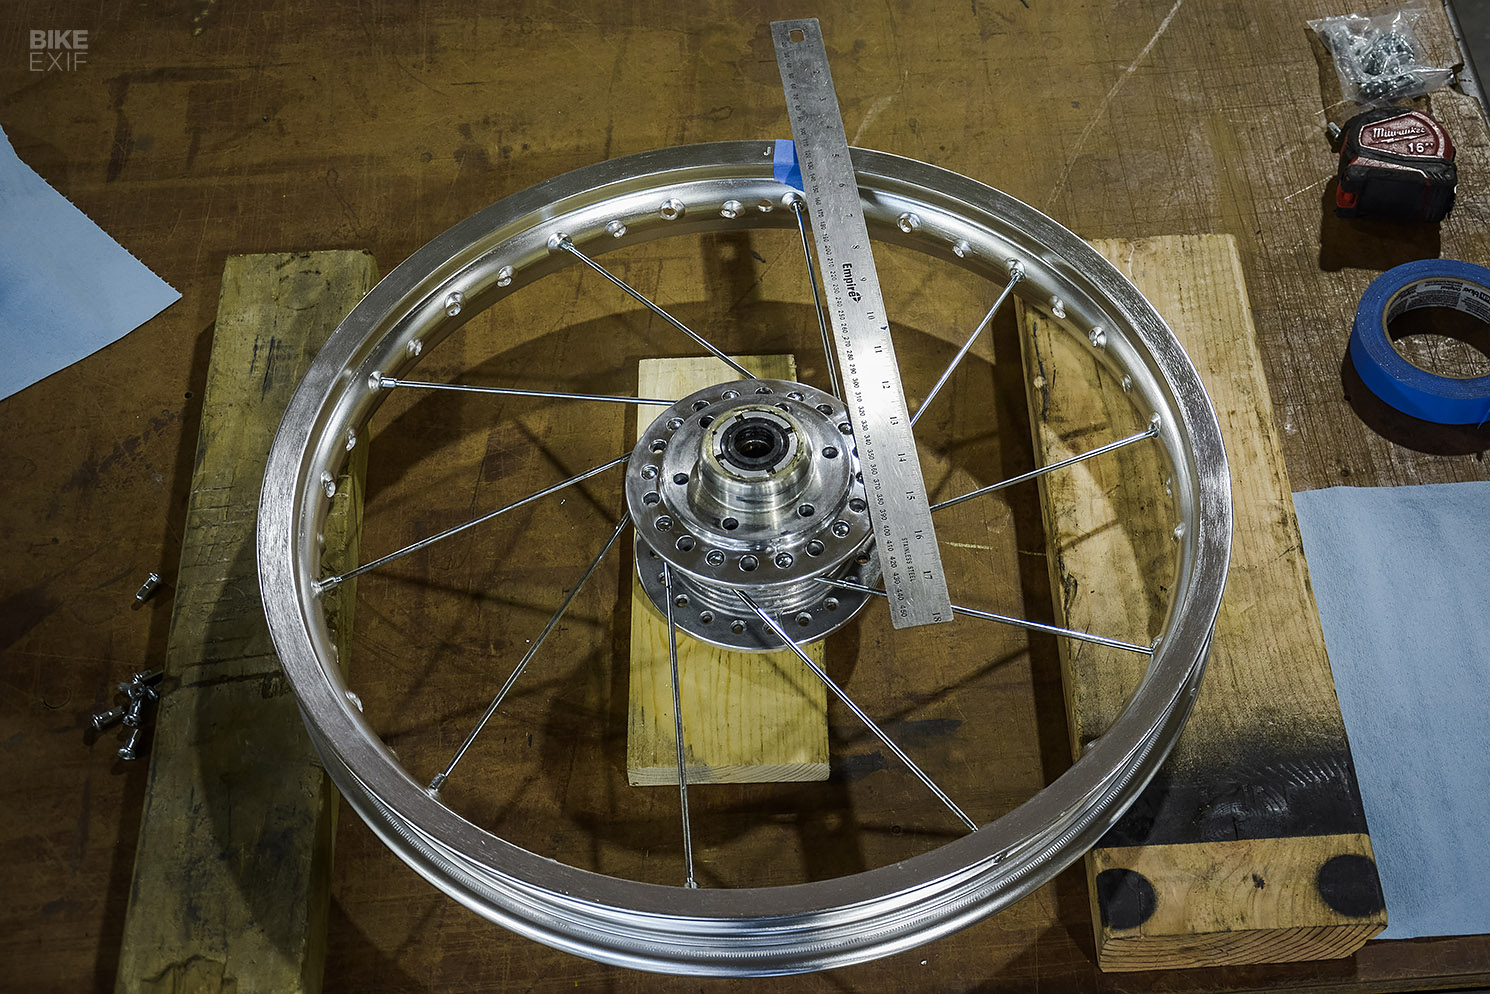
After taking place a rabbit gap on the web, I used to be extra confused than ever, however the course of truly turned out to be pretty easy while you get all the way down to it. Some spokes are inside spokes, some are outdoors spokes, and it’s fairly simple to do as soon as you determine your sample. With the wheels loosely assembled, we moved over to the flowery truing stand to make them straight.

Did I say fancy? Our setup was something however fancy, consisting of a Harbor Freight wheel truing stand and a magnetic-base dial indicator (additionally from Harbor Freight). Man, did it get the job carried out, although, and I used to be in a position to get our el cheapo aluminum rims trued to close perfection. The lesson right here: don’t be afraid to attempt new issues, even with the most cost effective instruments cash should purchase.
With the wheels completed, I used to be in a position to remind myself of simply how a lot I dislike mounting tires. I simply discover it to be a ache, particularly so while you mount one backwards and should redo it. [More]
Half 5: Riveting Readers with Rebuilt Suspension
I used to be within the temper for an additional simple win after the lengthy saga of constructing new wheels, so I turned my consideration in direction of our rusty, blown-out suspension. The rear could be no sweat, as it might be so simple as bolting on some recent rear shocks. I hoped to get my fingers on some spiffy Öhlins or TFX coils that Wes gets to play with, however it wasn’t within the playing cards. We ended up with some budget-friendly reservoir shocks from Tec Bike Parts, and I don’t hate them. The preload adjustment would turn out to be useful later, however I certain may use a knob for rebound.
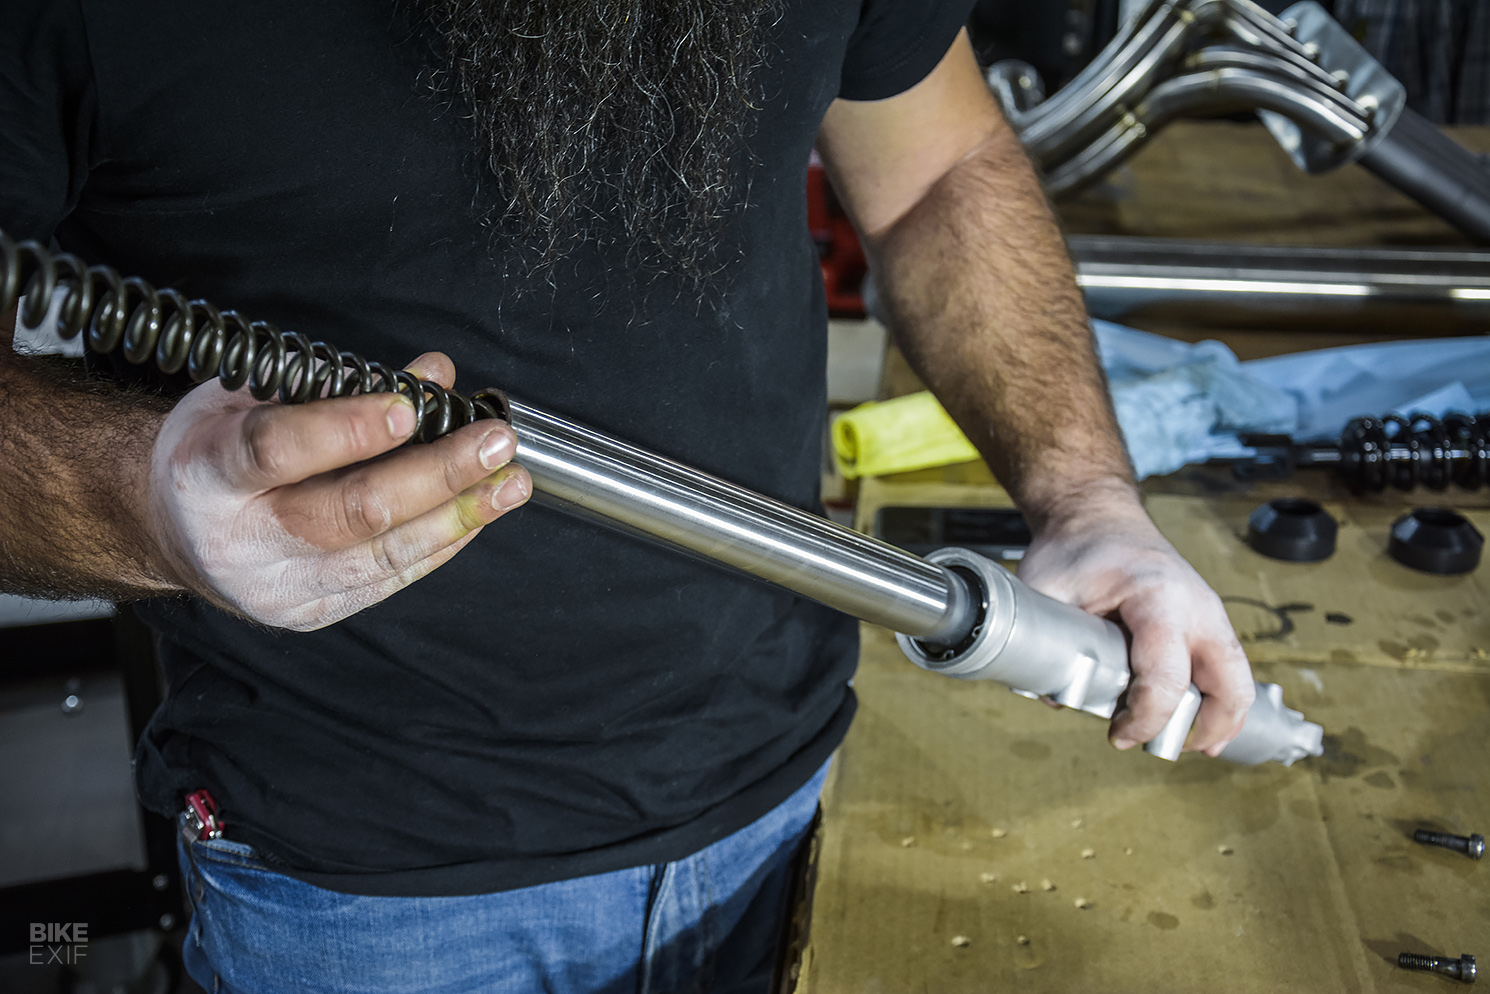
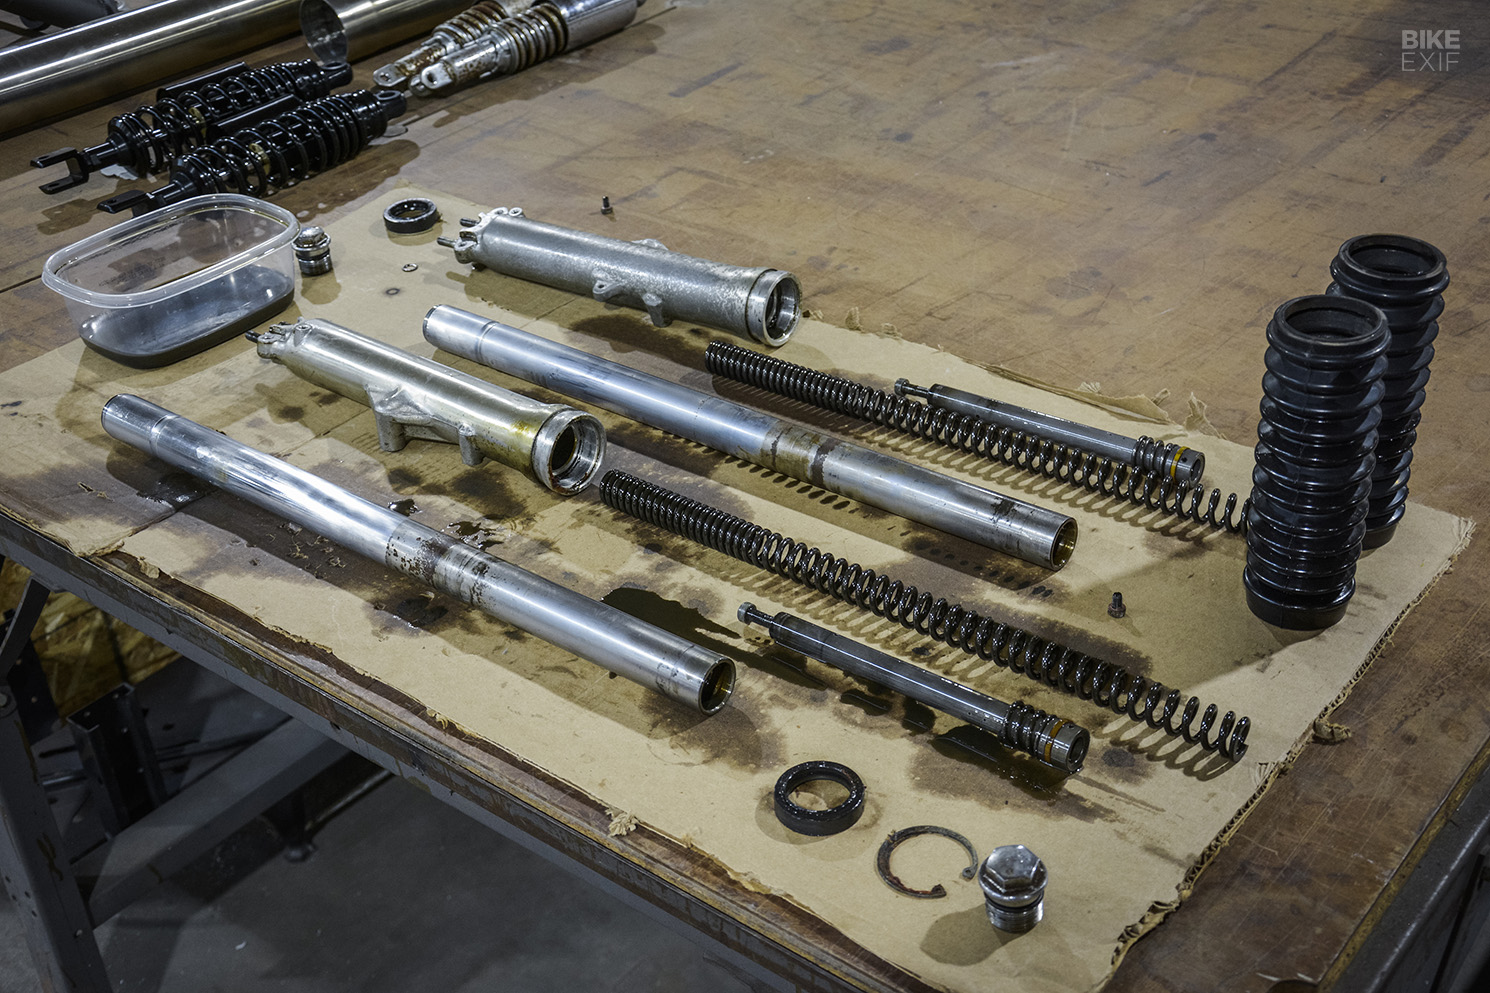
With the straightforward factor carried out, it was time to tear down the crusty and disgusting fork. Regardless of the mess, this stuff come aside fairly simply if you already know what to search for. The elements have been in tough form, although, because the fork lowers have been so pitted that I caught them within the bead blaster to scrub them up. A fast spit shine with WD-40 and Scotch Brite, and so they have been wanting good for reassembly with new seals and thicker oil.
Whereas it’s a messy job, rebuilding your forks is a superb alternative to enhance your trip, and it’s a job you shouldn’t draw back from for lack of expertise. [More]
Half 6: Fabrication and Wheel Bearing Exposé
My intention was at all times to maintain the installments on this construct orderly, with every half masking concise elements of the construct. However finally you end up with a bunch of random crap to do, and a bossman hassling you for the following chapter of the CB550 story. I had photographs of all types of minor duties, and Wes instructed me to name it “All of the Small Issues,” which I assumed was sensible.
The work began with new wheel bearings. The previous ones weren’t that unhealthy, however I crashed a bicycle once I was a child after my first try at rehabbing wheel bearings, and I suppose you possibly can say that have continues to be with me as we speak. It’s a reasonably easy job on a Honda, and I feel we confirmed a couple of cool methods for getting this carried out by yourself.
After that, we axed a bunch of tabs off the body that we wouldn’t be utilizing and revisited the fitment of our Tuffside seat. My aim was to get this factor to sit down completely flat on the rear subframe, and we ended up reshaping the rear hoop to make it occur. We additionally lower out and reshaped a part of the body the place the seat hooks up entrance. Now, the seat suits flawlessly. It sits tight on the subframe and flows completely with the underside of the gasoline tank. Once you butt hits this seat, it 100% has the texture of an OE set up.
That stated, I feel my proudest second of this installment was the entrance fender. I had talked about a number of instances that the fender didn’t match the radius of our bigger Bridgestone Battlax AX41 tire—it was simply too lengthy and crappy. So we lower it aside, slicing off each ends and welding them again on after shortening the center. That preserved the wired edge for an OEM look, and the radius now fits the bike completely. [More]
Half 7: I’m Not a Fabricator
For those who revisit one installment from this entire deal, please, let or not it’s this one as a result of it burned me out. I had some lofty metalworking objectives right here, and since I clack a keyboard all day, it took me an eternity to complete them. The struggling began with our crusty aftermarket exhaust.
“The exhaust in your basic motorbike speaks volumes (heh), however within the case of our dirt-cheap Honda CB550, our rusty previous aftermarket pipes instructed a story of damp storage and developments handed.”
Look, I’m certain you’d be scorching shit rolling as much as the perform with these trombones again within the day, however the look wasn’t doing it for me in 2024, and the rust wasn’t serving to. I reasoned that the pipes may look the half with a refined rework, which concerned slicing some size out of the pipes and fabbing up reverse cone ideas. The mix of tough previous 20 ga. metal and a giant ol’ Millermatic 350 loaded with .035 wire didn’t make the challenge any simpler, however the mixing wheel fixes all.
With the pipes accomplished, I turned my consideration to an thought I’d been kicking round because the begin of the challenge—some fly customized aluminum quantity plates. I most likely dinked round with 5 completely different cardboard designs earlier than I settled on these, and the bead curler and I have been effectively acquainted by the point it was throughout. I completed them off with a fast directional sand and dusted off my pinstripe brushes and One Shot paint for some aptitude. [More]
Half 8: Extra Customized Odds and Ends
By now, our Honda was actually beginning to appear like one thing. Whereas wiring loomed massive in my thoughts, we wanted to tie up some unfastened ends earlier than we crossed that bridge. The less complicated duties ranged from constructing a bracket for our Motogadget wheel velocity sensor to lastly axing the cumbersome heart stand. We additionally constructed a trick license plate mount down on the swingarm. Whereas this piece from Lowbrow Customs was designed for a rear fender, it retrofitted simply to the swingarm with just a little fettling.
I’m additionally happy with our ‘customized’ Biltwell Punisher XL pegs. These are candy pegs, however they’re supposed for Harleys and didn’t jive with our Honda clevis. We solved the issue by slicing the body aspect of our OE clevis and TIG-welding it to the peg aspect of the Biltwell clevis. Growth, Punisher XL pegs for Hondas.
The final huge hurdle was our entrance quantity plate, which had a number of jobs to do. The plate homes an LED we’re utilizing as a headlight, and we punched a pair holes in it for easy LED directionals. However since we have been low on house underneath the seat, we needed to discover a method to mount our Motogadget mo.unit blue behind the plate. The plate is hinged, so it may be folded down for servicing, and we fabricated a small aluminum field behind the plate for the mo.unit. The ultimate result’s fairly slick, and the hinge association lets you pivot the quantity plate to purpose the headlight. [More]
Half 9: On the Highway Once more
I used to be backed right into a nook—struggle or flight model—and the one means out was wiring. With solely electrical separating us from the top of our CB550 tracker construct, I referred to as in for reinforcements within the type of two associates extra educated with the multimeter than myself. Okay, I’m embellishing some, as wiring our Honda was fairly easy after I turned up a whole wiring diagram for Honda bikes utilizing the mo.unit blue, courtesy of Revival Cycles.
We nonetheless had some difficulties alongside the way in which, particularly with the CB’s ‘beginning motor security’ swap, and I most likely rewired the Motogadget mo.swap buttons three separate instances. It most likely took us a pair days to get it proper, however ultimately, this technique capabilities flawlessly.
With mild on the finish of the tunnel, we soldiered by way of the previous few fights our Honda would put up. The brake grasp puked its guts out, in order that wanted to be rebuilt, and the engine developed an Exxon-Valdez caliber oil leak from the countershaft seal. Fortunately, these elements have been available. We additionally needed to supply a complete new rack of Kehin carburetors after we discovered irreparable harm and lacking elements—most likely the entire cause this bike was parked within the first place.
September 24, 2025, was the day this pile of elements proved itself to be a bike once more. The engine lights off with the slightest contact of the beginning button, and it does every thing we may ask of it, from cruising freeway speeds to sliding round within the filth like a flat-track star. Each a part of the bike works precisely as we supposed, and you possibly can trip this factor all day lengthy and have the time of your life.
For these maintaining monitor at dwelling, that’s 1 yr, 11 months and 10 days separating the introduction of our Honda CB550 road tracker challenge from the purpose the place it was a operating, driving motorbike. That’s most likely not one thing to be happy with, contemplating we by no means even tore into the engine on this motorbike, however that’s not the essential factor in my thoughts. 42 years of sitting, that’s 15,340 days in the event you break it down, which means this motorbike was lifeless to the world for 5 instances longer than it lived. [More]
Perhaps you don’t love every thing we did right here, or perhaps you suppose we didn’t take it far sufficient, however everybody loves an underdog story, and I feel the transformation from $400 clunker to four-cylinder hoonmobile is one thing price celebrating. Anyway, I’ve gabbed sufficient about this motorbike. I hope you realized one thing alongside the way in which, or on the very least, discovered it entertaining. I’ll see ya on the following one, we now have extra chopping to do.
Trending Merchandise


