Taking a uncared for Honda CX500 and turning it right into a standout bike doesn’t have to interrupt the financial institution. With some easy restoration work and artistic, cost-effective customization, a rider may give new life to an previous bike. The method covers all the things from deep cleansing, engine and carburetor care, to upgrading the suspension and reshaping the gasoline tank for a greater look.
Specializing in sensible modifications like changing the cumbersome seat, adjusting the entrance finish, and ensuring the gasoline tank is rust-free can result in main enhancements. Every step is designed to maintain prices low, whereas utilizing instruments and supplies which can be simple to search out. These modifications make the bike extra private and trendy with out spending some huge cash.
Key Takeaways
- Prep and restore key elements earlier than beginning custom work
- Sensible design updates can rework a primary bike on a funds
- Monitoring prices all through helps handle the whole mission
Checking and Getting the Honda CX500 Prepared
Shopping for the Bike and Its Beginning State
The Honda CX500 was purchased in 2017 for $500 and served as a daily ride for a number of years. After that, it was lined and put into long-term storage. The bike confirmed indicators of being a typical, well-used motorcycle, nevertheless it had strong potential for enhancements.
Basic Repairs and Storage Steps
When the bike was not in use, it remained underneath a canopy to guard it from the weather. Earlier than any main work started, the proprietor began by performing routine cleaning and a few minor upkeep duties. This included draining previous gasoline, assessing rust contained in the tank, and checking for any seen harm or worn elements.
To maintain rust at bay, a rust removing product was poured into the tank and swirled round, following up with a tank sealer to maintain future rust from forming. The worth of maintaining elements dry and guarded turned clear after seeing how properly the gasoline tank responded to therapy.
Upkeep Guidelines:
- Drained previous gasoline
- Handled for rust within the tank
- Protected surfaces from moisture
- Lined and saved the bike when not in use
Beginning with Cleansing and Taking the Bike Aside

Step one in making ready the CX500 for modifications was an in depth cleansing. Key parts equivalent to carburetors have been eliminated and rebuilt to make sure clear operation. Elements like covers and sections of the tail and seat have been stripped off to disclose the body and permit for simpler entry.
Predominant duties on this stage:
- Cleaned all seen dust and particles
- Eliminated and rebuilt carburetors
- Began vapor blasting and portray choose elements
- Took off cumbersome seat and tail part for a slimmer look
Tip: Smaller duties, like managing bolts and washers, assist hold all the things tidy and stop future points with reassembly. Utilizing the appropriate methods for dealing with plastic, metal, and foam—like mild heating and correct adhesives—helped form parts for a exact match.
An intensive strategy to cleansing and disassembly set the muse for all future customized work on the bike.
Motor Upkeep and Carburetor Work
Floor Remedy and Contemporary Paint
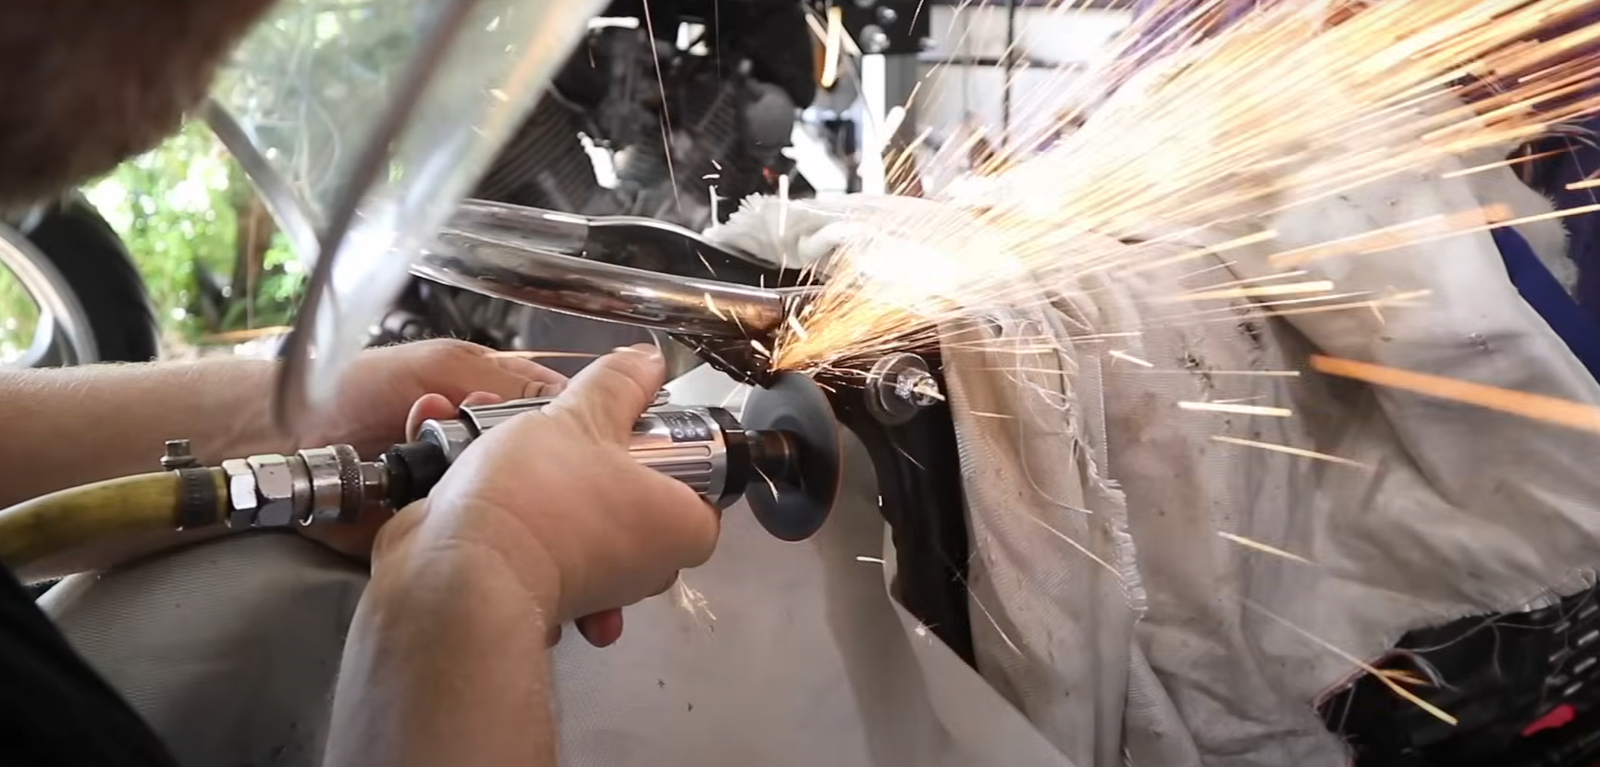
The workforce eliminated key engine elements for vapor blasting. This made previous metal surfaces clear and restored their look. After blasting, they utilized a new layer of paint to provide these parts a recent look. This course of could be repeated for a lot of kinds of bikes, making worn elements look virtually new.
Instruments Used:
- Vapor blasting machine
- Paint and brushes or spray cans
Steps Adopted:
- Detach engine elements.
- Vapor blast every bit.
- Let elements dry absolutely.
- Paint and let treatment earlier than reassembly.
Rebuilding the Gas Mixer
The carburetors have been taken off the bike. They have been absolutely disassembled and cleaned out to take away dust and buildup. New elements have been put in, after which the carburetors have been assembled once more and positioned again onto the engine.
Carburetor Rebuild Guidelines:
- Take away and examine all elements
- Clear jets and passages
- Substitute worn gaskets and seals
- Reassemble with care
- Re-install on engine
Engine First Begin After Repairs
As soon as the engine and carburetors have been again in place, the workforce tried to start out the bike. This was the primary begin after all of the cleansing and rebuilding. For those who work by yourself bike, anticipate to check and verify for easy engine operating after related repairs. If there are issues, use a primary guidelines to search out what is likely to be improper.
| Step | What to Verify |
|---|---|
| Activate engine | Hear for easy idling |
| Rev throttle | Look ahead to clear acceleration |
| Watch exhaust | Make sure that smoke is minimal |
Use these steps to assist get your bike operating once more after repairs.
Low-Price Methods to Personalize Your Motorbike
Finances-Pleasant Improve Strategies
They began their mission with an older Honda CX500, bought for simply $500. After cleansing, blasting, and repainting some elements, they centered on eradicating cumbersome sections just like the inventory tail, lights, and seat to create a sleeker look.
Listed here are some easy and reasonably priced steps they used:
- Entrance fork decreasing: As a substitute of shopping for new elements, loosen the triple clamp bolts and slide the forks up. They advocate upgrading the fork springs for higher efficiency, however the primary change is almost free.
- Reusing previous elements: Eliminated seats and different parts from earlier builds could be reused for the brand new bike, saving cash.
- Minimalist modifications: Simply chopping the again finish and including a slimmer seat gave the bike a a lot cleaner look with low further price.
They usually made design modifications alongside the way in which to maintain issues each handsome and low-priced.
Ideas for Making Customized Elements Your self
For home made fabrication, they relied on easy-to-find instruments and provides. Utilizing easy cuts and welds, they reshaped the body and physique to realize their most popular fashion.
Some ideas they shared:
- Body chopping methods: Minimize the rear of the body in clear traces. When working with seams, solely take away what’s wanted and use TIG welding for neat joints.
- Warmth for shaping: Warmth plastic seat bases in an oven for large bends, then use a warmth gun for element shaping. This helps get a customized match with out costly instruments.
- Use seat clip kits: Attaching the seat with clip units makes it simple to take away or regulate. Rivets or small screws work properly for fixing the clips onto steel elements.
They advocate utilizing high-density foam for seats and glue for shaping. Burnt areas from heating plastic aren’t an issue since they get lined with foam.
Mixing and Matching Elements from Different Fashions
They confirmed that many of those steps work on a spread of bikes, not simply the CX500. For instance, seats and sure {hardware} can match a number of fashions if the place to look.
Fast options for cross-model swaps:
- Measure earlier than reusing elements like seats or brackets to verify fitment.
- Common hoops and tail lights could be tailored to suit completely different frames with minor modifications.
- Reusable seat clips and foam are available varied sizes to suit a number of bikes.
They identified that cautious planning and primary expertise allow you to switch strategies and elements from one mission to many others, maintaining issues reasonably priced.
Rear Body and Customized Seat Work
Taking Off Inventory Parts
The unique rear finish comes with a big seat and hulking lighting. These elements get eliminated first to start out the transformation. By taking them off, the body is extra open and prepared for modification. The brand new look turns into a lot cleaner immediately.
Steps:
- Take off the previous seat.
- Take away the tail light and indicators.
- Put aside smaller items for later, equivalent to washers or rubber mounts.
Chopping and Adjusting the Body
To make room for a slimmer seat and higher traces, the body must be shortened and reshaped. The lower is measured from the tip of the unique body, ensuring the brand new again finish is neat. Generally, seams and welds want particular consideration.
Body Chopping Particulars:
| Motion | Measurement/Observe |
|---|---|
| Measuring lower | About 160 mm or extra |
| Coping with seams | Minimize prime, tie backside in with new elements |
| Weld kind | TIG welding really useful |
It is very important double-check lower traces earlier than making any modifications. Chopping is normally finished with the body drained and funky for security, particularly across the gasoline tank.
Putting in a New Hoop and Built-in Tail Gentle
After chopping, a brand new hoop is fitted to the again of the body. Many hoops have a tail mild constructed into them for a sleeker look. These items could be painted earlier than remaining set up.
Set up Ideas:
- Check-fit the ring earlier than welding.
- Use triangular brackets if wanted to assist the ring.
- Cap and paint any uncovered edges.
For the seat, use a thermal plastic base and high-density foam. Connect the seat with clips, utilizing rivets or screws, and mark holes rigorously to line up with the body. The completed result’s a neat again finish with a agency, lightweight seat and built-in lighting.
Adjusting the Entrance Suspension
Reducing the Entrance Forks
To offer the bike a greater stance, it helps to deliver the entrance finish down a bit. This may be finished by loosening the bolts on the triple clamps. As soon as unfastened, the entrance forks could be slid upward to the specified top. Many riders use this technique as a result of it doesn’t require any particular instruments and could be finished pretty shortly.
Steps:
- Use the right measurement instruments to loosen the triple clamp bolts.
- Rigorously slide every fork as much as the identical top on each side.
- Retighten all bolts securely.
Tip: Verify fork alignment earlier than driving.
Putting in Higher Fork Springs
If the entrance finish has been lowered, putting in stronger springs contained in the forks is a good suggestion. Progressive fork springs is usually a huge improve over previous or worn-out inventory springs. These give the entrance forks higher assist and make the suspension really feel extra managed.
Upgrading Fork Springs:
- Reduces entrance dive when braking
- Provides smoother dealing with over bumps
- Works properly with the lowered stance
Utilizing increased high quality springs makes a giant distinction, particularly after altering the peak of the entrance finish.
How Adjustments Have an effect on Trip Consolation
Reducing the entrance does make the bike look higher, nevertheless it additionally modifications how the suspension works. When the forks are moved up within the triple clamps, the quantity of journey is decreased. This implies there’s much less house for the forks to maneuver up and down over bumps, which may make the experience really feel stiffer.
Doable Results:
| Change | Outcome |
|---|---|
| Lowered entrance forks | Much less suspension journey |
| Progressive fork springs | Extra assist and fewer harsh bottoming out |
| Stiffer suspension | Smoother experience, however much less cushion over bumps |
It is very important take into consideration these modifications so the experience high quality matches how the bike seems to be. Upgrading the fork springs will help steadiness the consolation and dealing with.
Gas Tank Updates and Rust Safety
Strategies for Elevating the Tank
Elevating the again of the gasoline tank modifications the bike’s look. There are just a few methods to do that. A typical technique is to chop the tank at a sure spot and add steel items to boost it. Utilizing the unique rubber mounts saves effort and time.
Some individuals use metal washers as spacers, however this may look untidy. A cleaner resolution is to make customized mounts to elevate the tank about 20 mm. The hot button is maintaining a pleasant circulate from the tank to the brand new seat base. This helps the seat match higher and look extra skilled.
Tip: Earlier than modifying the tank, at all times drain the fuel and fill it with water to keep away from fireplace dangers.
Steps for Chopping and Welding Safely
When working with tank seams, particularly on older fashions, search for spot welds. These are sometimes spaced round 40 mm aside. Chopping the seam according to the remainder of the body offers a neat end. After chopping, TIG welding is an efficient selection for robust, clear joints.
Whereas welding, hold the world cool. Utilizing a moist rag across the work zone helps defend paint, plastic, or rubber from warmth harm. If any plastic does get scorched, it may be sanded down later.
Fast Listing:
- Drain and fill tank with water earlier than beginning.
- Plan your cuts on the tank utilizing tape for a visible information.
- TIG weld for robust and neat outcomes.
- Defend all the things round with water or a moist towel.
Eradicating Rust and Sealing the Tank
To deal with rust contained in the tank, use a high quality rust remover like KBS Rust Blast. Pour it in, slosh it round, and let it sit so long as wanted based mostly on the rust degree. This product could be reused many occasions.
After cleansing out the rust, apply a tank sealer kit. This seals the within and retains rust from coming again. Following the equipment directions makes a giant distinction and means you gained’t have to fret about tank rust afterward.
| Product | Function |
|---|---|
| Rust Blast | Removes rust from inside |
| Tank Sealer | Seals inside to forestall rust |
Greatest Follow: At all times seal the tank after cleansing for long-lasting outcomes.
Constructing and Attaching the Seat Base
Shaping the Predominant Seat Panel
To begin, they rigorously form the primary a part of the seat panel to match the traces of the bike body. Utilizing an oven for bigger bends, they regulate the fabric to get easy curves. For smaller areas and fine-tuning, a warmth gun or blow torch works finest. The aim is to verify the seat base covers all wanted sections and matches tightly in opposition to the bike.
Choosing and Including Cushion Materials
Excessive-density foam is chosen for its consolation and assist. The froth is available in completely different thicknesses to match the design and sort of seat needed. After chopping the froth to measurement, it’s glued to the fashioned seat base. At this stage, it’s simple to form the highest and add any hump or styling options wanted.
Attaching the Seat Fasteners
They use a set of 4 seat fasteners, with two on the entrance and two on the again. The clips embody a male half (added to the seat panel) and a feminine half (hooked up to the bike body). To position the entrance clips precisely:
- Discover present holes within the bike body.
- Drill out these holes to the appropriate measurement.
- Use double-sided tape to stay the clip in place whereas take a look at becoming the seat.
- Mark and drill holes within the backside of the seat base after aligning.
Mounting the clips depends upon the bottom materials. For steel, rivets are most popular. For different supplies, small screws can be utilized. Every clip is fastened with two rivets for safety. This strategy helps obtain a clear, sturdy seat installation.
Mission Price Breakdown
The preliminary price for this Honda CX500 was $500.
Most work centered on cleansing, portray, and rebuilding parts just like the carburetors. No main engine elements have been changed. The mission used present supplies the place potential to maintain spending low.
Customized fabrication included a brand new seat and rear part. The seat foam, seat base, and mounting clips have been chosen for his or her good worth and have been simple to adapt to completely different bike fashions. Some welding and portray supplies have been wanted together with primary instruments.
A basic listing of bills:
| Merchandise | Estimated Price (USD) |
|---|---|
| Honda CX500 bike | $500 |
| Seat foam | Low |
| Thermoplastic seat base | Low |
| Seat mounting clips (pack of 4) | Low |
| Paint and primer | Low |
| Welding provides | Low |
| Rust removing and tank sealer equipment | Low |
Different fittings, like tail mild hoops and seat clips, have been simple to supply and set up. Many small elements may very well be reused or modified to suit.
All predominant modifications have been made with cost-effectiveness in thoughts, leaving costly replacements or upgrades out. These steps assist hold the mission reasonably priced and accessible.
Trending Merchandise