Restoring outdated bikes is greater than only a pastime as a Cafe Racer. For a lot of, it’s a technique to study new expertise, tackle inventive challenges, and construct one thing really distinctive. Every undertaking presents an opportunity to attempt totally different strategies and produce new life to forgotten machines.
This text follows one particular person’s journey as they create a rusty 1981 Yamaha XJ650 again to life. The method consists of fixing mechanical points, including customized elements, and making daring design decisions. By means of exhausting work, endurance, and assist from others, this construct reveals how rewarding it may be to see an concept flip into actuality.
Key Takeaways
- Restoring outdated bikes is an opportunity to build skills and take a look at new concepts.
- Customized work and a focus to element make every undertaking particular.
- Ending a motorcycle takes endurance, teamwork, and dedication.
Why Restoring Previous Bikes Feels Rewarding

Selecting Up Helpful Skills
Restoring outdated bikes provides folks the prospect to study by doing. Every step, like taking aside the engine or fixing the body, teaches one thing new. They may attempt issues they by no means thought they might do, akin to utilizing 3D printing or welding new items onto the bike. Errors do occur, however making an attempt once more helps them get higher over time.
Right here’s a brief checklist of what they may study:
- Utilizing new tools like CNC machines
- Studying about 3D modeling and printing
- Understanding methods to set up and wire electrical elements
Professional Tip: Even when one thing appears exhausting at first, observe makes it simpler.
Letting Creativeness Lead the Means
Restoring isn’t just about repairs; it’s about creating something special. Builders typically check out bold ideas, like becoming a thick rear wheel or including a singular twin headlight. There isn’t a single “proper” method — each undertaking will be totally different.
| Artistic Selections | Instance |
|---|---|
| Customized Paint | Mixing new colours for the physique |
| Distinctive Components | 3D printed exhaust ideas |
| Customized Design | Handmade seat or tailights |
Builders get pleasure from watching their concepts grow to be actual. Each small detail, like new nuts or a clear body, provides up and makes the bike really their very own.
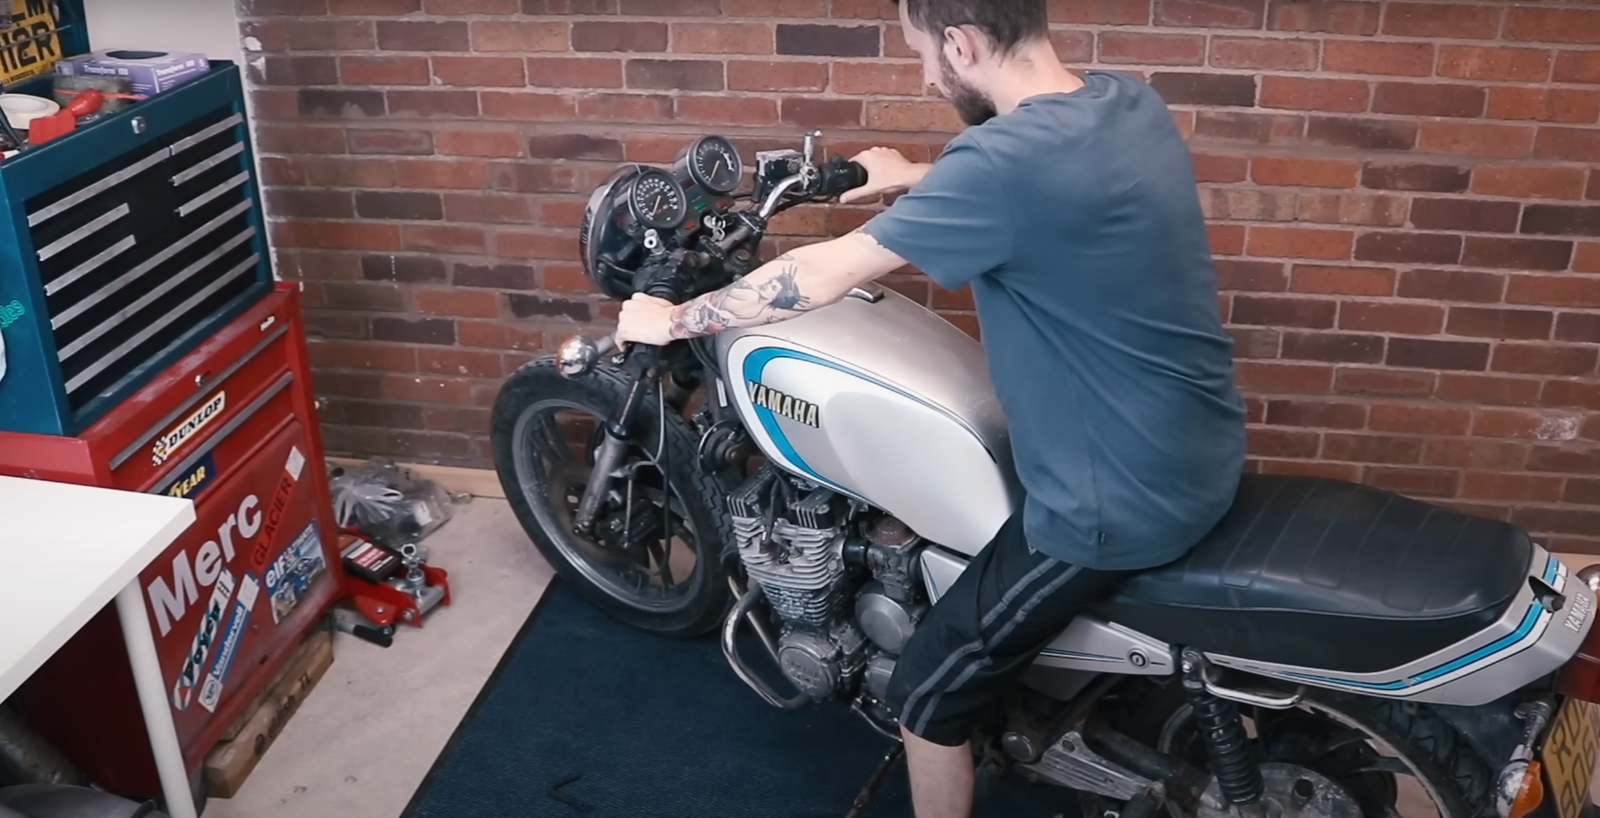
Venture Overview: 1981 Yamaha XJ650
Major Objectives for the Yamaha Construct
The plan for this bike is to create a contemporary basic. The proprietor desires it to maintain its old-school model however use new constructing strategies. This consists of making custom parts, like CNC bump stops and 3D printed steel ideas, to offer the bike a recent look.
There’s a robust give attention to studying new expertise through the course of. Constructing this bike means making an attempt issues which have by no means been carried out earlier than by the builder. The undertaking is about having fun with the journey, choosing up new information, and constructing one thing distinctive with private touches.
Key Construct Targets:
- Preserve the retro look
- Use new techniques and instruments
- Make customized items for various elements
- Add particular touches, like a chunky rear wheel and distinctive headlights
Dealing with Rust and Exhausting Work from the Begin
This 1981 Yamaha XJ650 began out in tough form, with a number of rust. Getting the bike operating was the primary powerful step. The work included including new filters and fluids to ensure the engine may run easily.
A lot of the duties, like chopping the rear finish and welding on new elements, had been new to the proprietor. There was a number of trial and error. Fixing the bike took over two and a half years, and each stage—cleansing the engine, sorting the powder coating, doing the wiring—had its personal issues.
Duties That Wanted Further Effort:
| Step | Problem |
|---|---|
| Restoring the body | Heavy rust |
| Customized elements fabrication | Studying new strategies |
| Wiring the electrics | Inexperience |
| Lengthy construct time | Over 2.5 years |
Even with all the difficulty, each small win and accomplished job made the trouble price it. The method was sluggish and wanted a number of endurance, however seeing the outdated bike come collectively was very rewarding.
Getting the Bike Able to Begin
Swapping Filters and Fluids
Step one was to vary out all of the outdated filters and fluids. They put in a recent oil filter and new oil. The air filter was soiled, so it acquired changed too. Coolant and brake fluid had been each swapped with clear, new fluids. This helps the engine and different elements work higher and last more.
A fast guidelines for these steps:
- Change oil and oil filter
- Substitute air filter
- Fill with recent coolant
- Add recent brake fluid
These small steps made a giant distinction for getting the bike able to run.
Testing the Engine for the First Time
After altering out the fluids and filters, it was time to see if the engine would begin. The engine fired up and ran nicely. Although it nonetheless wants a tune-up, it labored even after sitting for a very long time. Listening to the engine run once more was a big moment within the construct. It meant the bike was on its method again to the street.
Observe: The engine will want some fine-tuning, however getting it began was a superb signal. Seeing the bike come again collectively introduced a number of pleasure to the undertaking.
Distinctive Components and Upgrades
Machine-Made Metallic Options
To get the precise match and form, lots of the steel elements on the bike had been made with CNC machines. These elements embody issues like bump stops and different small parts. The usage of CNC lets builders make items which might be each robust and look nice. Every half is measured and reduce to suit, serving to the bike really feel recent whereas holding a few of its old-school appeal.
Customized CNC Highlights:
- Precision bump stops
- Hand-finished brackets
- Distinctive match for every half
3D Metallic Printed Tailpipe Ends
As a substitute of utilizing commonplace exhaust ideas, the builder created one-of-a-kind steel ideas with a 3D printer. This technique lets them check out shapes and types that will be exhausting to make by hand. The steel ideas add a particular contact to the experience and provides the again of the bike a contemporary really feel.
Why 3D Prints Stand Out:
- Distinctive shapes potential
- Clear end on every bit
- Robust, steel design
| Function | Commonplace Suggestions | 3D Printed Suggestions |
|---|---|---|
| Customized Shapes | Restricted | Many Choices |
| Manufacturing Pace | Sluggish | Quick |
| Total Look | Plain | Fashionable |
New Wheels Entrance and Again
A giant a part of the construct was upgrading each the entrance and rear wheels. The entrance finish was improved first, and the again wheel was made wider to match. This helps the bike look balanced and durable. Every wheel was chosen to offer the experience a recent look, whereas nonetheless becoming the remainder of the basic design.
- Wider rear wheel for extra grip
- Chunky tires for a daring look
- Matching types on each ends
Body and Construction Modifications
Slicing and Welding the Again Finish
The outdated body needed to be modified, so the again half was reduce off. A brand new curved piece was made and welded as an alternative. This was the primary time doing a few of these steps, nevertheless it turned out significantly better than anticipated.
Errors occurred alongside the way in which, however making an attempt once more helped get it proper. The exhausting work paid off and regarded good as soon as completed. Customized elements and decisions made this a part of the construct distinctive.
Coating the Body with Powder
After the body was welded and all the additional brackets had been eliminated, it was prepared for powder coating. This course of gave the body a powerful, clear end within the base coloration. Seeing the body come again with a fresh look felt thrilling.
Powder coating made it prepared for the subsequent steps in placing the bike again collectively. The clear body additionally made the engine and different elements look higher as soon as put in.
Standout Construct Options
Tail Gentle Concepts from Acrylic
The builder tried one thing new with the tail gentle on this bike. As a substitute of utilizing a traditional model, they used ideas from other builders, like these at Auto Fabrica. They made an acrylic tail light, however made it in their very own method.
This course of was one thing they hadn’t carried out earlier than. They labored exhausting to get it proper. When it was completed, the tail gentle regarded even higher than anticipated.
- Unique course of: Impressed by high builders, however designed their very own
- Materials used: Acrylic
- Technique: Trial and error till it labored
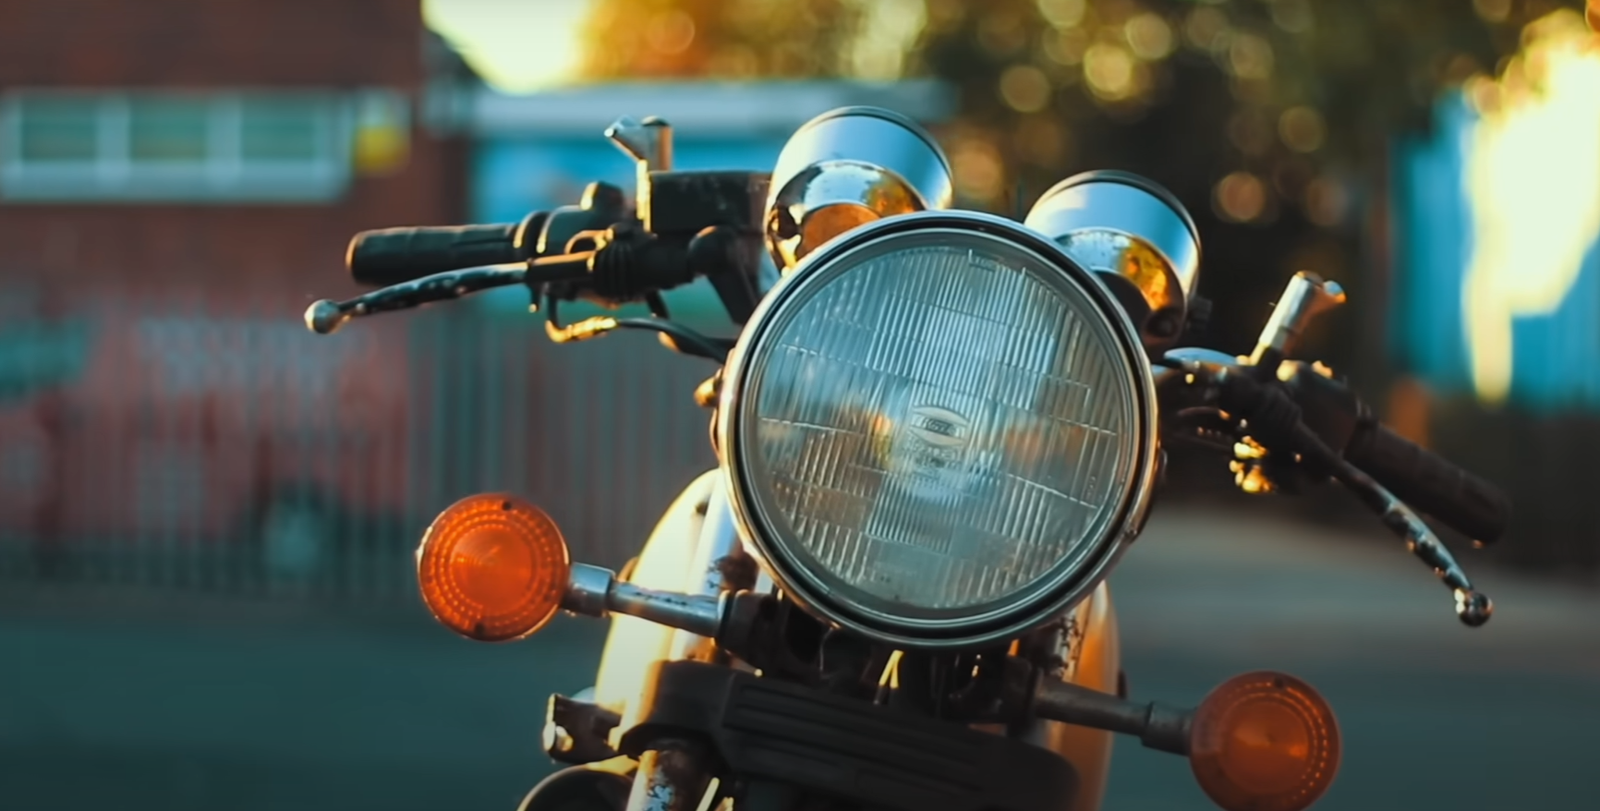
Double Block-Model Headlights
In addition they needed the entrance to be particular. As a substitute of a single headlight, they selected to make use of two boxy headlights.
It took further work, however the builder appreciated how totally different it regarded. Even when some folks don’t just like the model, it’s clear that a number of effort went into making it stand out.
- Sort: Twin sq. headlights
- Motive: To attempt one thing few others do
- Consequence: A daring, uncommon search for the entrance of the bike
Detailing and Placing It All Collectively
Small Components and {Hardware}
Paying shut consideration to every nut, bolt, and tiny piece is vital throughout this a part of the undertaking. Each screw and fastener added makes a giant distinction in how the bike seems to be and works. This step takes time, however ensuring every part matches proper is what separates a superb construct from an amazing one.
Right here’s a easy guidelines they adopted:
- Sorted all {hardware} by dimension and sort
- Checked every half for rust or harm
- Cleaned or changed outdated nuts and bolts
- Tightened every part fastidiously to keep away from stripping
| Half | Checked? | Cleaned? | Changed? |
|---|---|---|---|
| Engine Bolts | ✓ | ✓ | ✓ |
| Body Fasteners | ✓ | ✓ | x |
| Headlight Mounts | ✓ | ✓ | x |
| Rear Wheel Nuts | ✓ | ✓ | ✓ |
Specializing in these particulars helps the bike not simply look higher but in addition keep robust and protected for driving.
Teamwork and Thanks
Nobody builds a customized bike fully alone. Many alternative folks helped at totally different occasions, giving assist, sharing recommendation, or pitching in with duties. Their assist saved the undertaking transferring, even when issues acquired powerful or took a very long time.
The builder made positive to thank everybody who helped out. Their names and work are shared on social media, giving them credit score for his or her half within the undertaking. Every particular person made a distinction, and the bike wouldn’t look the identical with out their assist.
This type of teamwork reveals how a lot a construct like this will depend on shared expertise and energy. Everybody’s exhausting work helped convey the completed bike collectively.
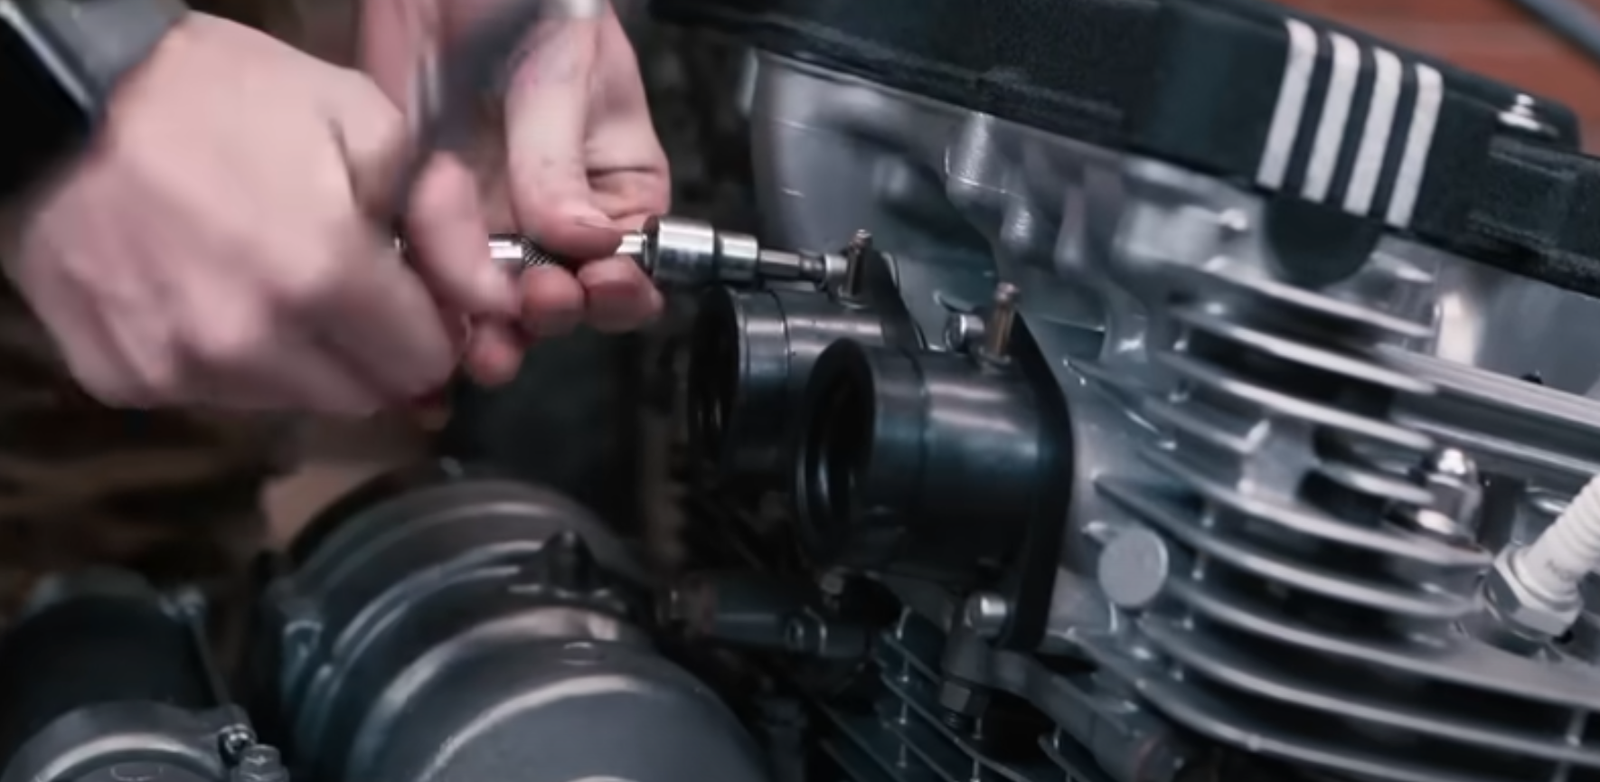
Wiring System Enhancements
Setting Up the Major Management Field
The builder selected to make use of the M Unit for {the electrical} system. This half is thought for the way easy it makes wiring, even for individuals who don’t get pleasure from this a part of constructing bikes. The bike had been in items for a very long time, so it was a giant second to get the wiring sorted out.
Key modifications:
- The outdated wiring was changed
- The new M Unit made connecting every part simpler
- The system is cleaner and fewer crowded
This made the job a lot much less anxious and helped maintain the construct neat and arranged.
Changes and Beginning for the First Time
After organising the wiring, the bike was prepared to start out. It wanted some basic tuning and a primary test to see if every part was working proper. The builder was excited to listen to the engine run once more after all of the updates.
Duties accomplished:
- Ensuring all wires had been related appropriately
- Checking the controls to substantiate they labored
- Listening to the engine and making small changes
A desk of checks:
| Job | Standing |
|---|---|
| Wiring full | Sure |
| Engine runs | Sure |
| All controls examined | Sure |
Getting the tuning proper was vital to ensure the bike would run easily when it was time to experience.
Remaining Particulars
Constructing the Seat and Including Upholstery
The customized seat base is constructed to match the model of the bike. As soon as the bottom is completed, it goes to knowledgeable upholsterer. Right here, they cowl the seat with new material for a clear, easy look. This step provides the seat each consolation and a completed model.
Seat Particulars:
- Customized-shaped base
- Despatched to upholsterer
- Coated in new materials for consolation
Shaping the Physique and Making use of Shade
After the primary construct, work turns to the physique panels. They’re formed and made prepared for portray. The paint is combined to get simply the precise coloration. As soon as sprayed on, it brings the undertaking collectively. Brilliant, recent paint provides the bike a brand new, completed look.
Steps:
- Form the physique panels
- Prep the floor
- Combine and spray paint
- Let it dry and rebuild the bike
A well-done paint job makes every part look recent and helps shield the bike for the miles forward.
Wrapping Up and Transferring Ahead
Constructing a customized bike means studying each step of the way in which. Every new ability opens up other ways to form and repair each half. Errors occur, however so does enchancment. Even when one thing takes just a few tries, it’s all a part of the method.
Subsequent steps within the construct:
- Clear up the smaller elements and test all of the wiring.
- Ship the seat base out for upholstery.
- End the physique work and get the paint carried out.
- Put every part again collectively for the ultimate time.
- Tune the engine earlier than the primary experience.
It takes a group to make a undertaking like this work. Each particular person concerned has helped make every element higher. The thrill grows because the bike nears its first take a look at experience. Updates and extra steps will probably be shared quickly.
Trending Merchandise